Due to some specific terms and conditions the Countries spatial dataset cannot be distributed together with the application. In order to use Union VMS you will need to process and import this dataset manually. This section describes in detail this procedure.
Union VMS strictly requires a Countries spatial dataset in its spatial database. Without this dataset the system will not work as expected.
1. Donwloading the Countries spatial dataset
The recommended Countries spatial dataset to use within the Union VMS application can be downloaded at the Eurostat website. You should download two specific datasets as described in the following table.
| Administrative or Statistical Unit | Scale | Format | File name |
|---|---|---|---|
| Countries 2014 | 1:3 million | Shapefile | CNTR_2014_03M_SH.zip |
| 1:20 million | Shapefile | CNTR_2014_20M_SH.zip |
The use of these datasets requires that you agree with some terms and conditions. Please read them carefully.
2. Importing the shapefiles into Union VMS spatial database
We recommend the use of QGIS (an open source Desktop GIS) to import these files into the Union VMS spatial database. The following instructions will assume that you have downloaded and installed QGIS (available here) in your system.
2.1 Importing shapefiles into QGIS
- Unzip the file named CNTR_2014_03M_SH.zip
- Open QGIS
- Press the "Add vector layer" button (
 ) and then the browse button
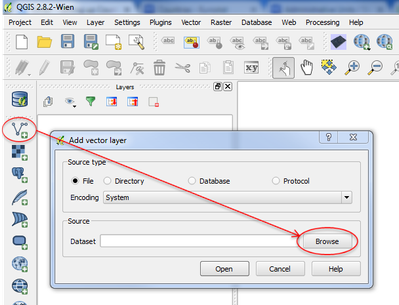
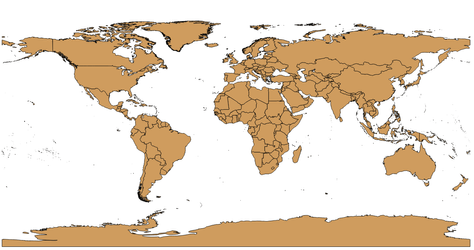
- Select the CNTR_RG_03M_2014.shp file and press the button "Open". You should now see a map of the world similar to the following:
2.2. Configuring Union VMS spatial database in QGIS
Click the "Add PostGIS layers" button (
 ) and then in the "New" button inside the "Connections" section and fill in all the fields with your current Union VMS settings. You can press the button "Test connect" to validate your definitions.
Field name Description Example Value Name The name to be used as an alias for the connection parameters union-vms Host The IP address or hostname of the server where the Union VMS database is deployed localhost Port The Union VMS database server port 5432 (if you have used doker installation this will be 25432) Database The Union VMS database name db71u Username The name of the user for the database connection postgres Password The password for the specified user
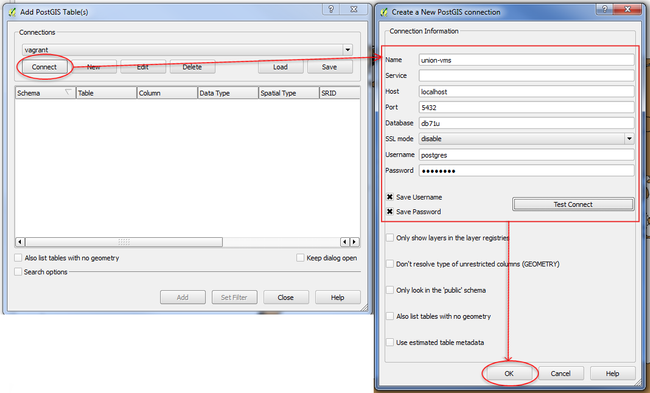
- Once you've finished, press the "Ok" button and then the "Close" button
2.3. Importing the shapefiles into the database
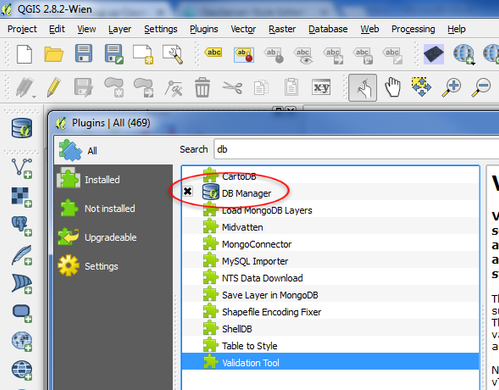
- In the top menu, click in "Plugins" and then in "Manage and install plugins". Check that the "DB Manager" plugin is installed and activated. If not, install it and activate it. Press the button "Close".
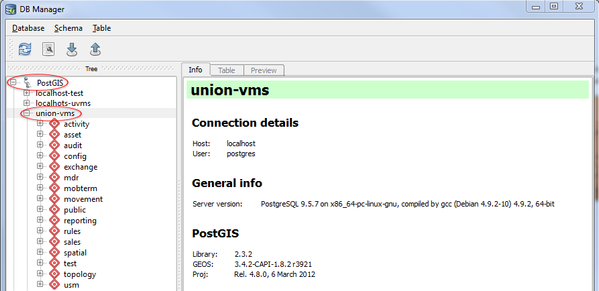
- Click on the "DB manager" plugin button (
 ). On the left panel, expand the "PostGIS" node and should see the connection node you have created in the previous step (in this case called union-vms). Expand that node and you should see all the schemas that are used within the Union VMS application (e.g. spatial, rules, mdr, asset, ...).
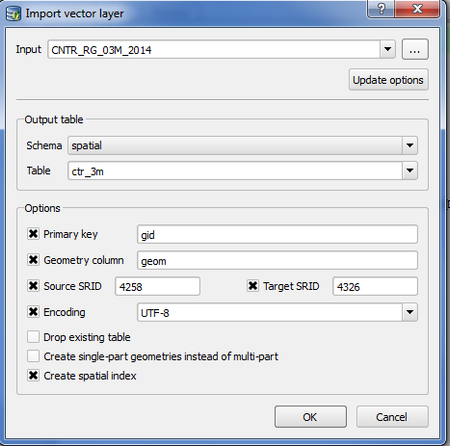
To start importing the shapefile into the spatial database press the "Import layer/file" button (
 ). In the new window, do the following configurations
Field name Value Input CNTR_RG_03M_2014 Schema spatial Table ctr_3m Primary key gid Geometry column geom Source SRID 4258 Target SRID 4326 Encoding UTF-8 Be sure to check the option "Create sptatial index".
- Press the "OK" button to start importing the shapefile into your database. When finished you should be able to see your new layer listed under the spatial schema.
Repeat the previous steps for the other zip file (CNTR_2014_20M_SH.zip) you have downloaded changing your configurarions according to the following:
Field name Value Input CNTR_RG_20M_2014 Schema spatial Table ctr_20m Primary key gid Geometry column geom Source SRID 4258 Target SRID 4326 Encoding UTF-8
2.4. Importing additional Countries metadata into the database
Within the datasets that you have downloaded there is a DBF file (CNTR_AT_2014.dbf) that contains additional metadata that is important to have within Union VMS. The next steps are describing how this file can be imported into the database.
- Open QGIS
- Press the "Add vector layer" button () , select UTF-8 as the encoding option.and press the "Browse" button.
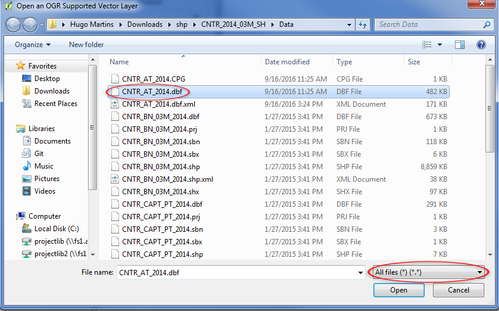
- In the new window, navigate to the folder where you have unzipped the files and select the CNTR_AT_2014.dbf file and press the "Open" button. If you don't see it listed, be sure that the option "All files" is selected.
- You should now see a table listed in the left panel of QGIS.
- Click on the "DB manager" plugin button (). On the left panel, expand the "PostGIS" node and should see the connection node you have created before (in this case called union-vms). Expand that node and you should see all the schemas that are used within the Union VMS application.
- To start importing the DBF into the spatial database press the "Import layer/file" button (). In the new window, do the following configurations
Field name Value Input CNTR_AT_2014 Schema spatial Table ctr_metadata - Press the "OK" button to start importing the shapefile into your database. When finished you should be able to see your new layer listed under the spatial schema.