DRAFT - JIRA and GitHub workflow in practice
- Kristofer Hansson Aspman
This page is work-in-progress.
Introduction
This document describes how the GitFlow workflow described in GITHUB branching is implemented within the FOCUS project. Git commands as well as JIRA and GitHub features are described to show how the tools are intended to be used.
JIRA
The typical scenario starts in JIRA with the creation of an issue (see RFC Process for details regarding the process). The issue may be a bug, an improvement or a request for a new feature. Once created, the issue is analysed and prioritised before it's passed off to implementation. The implementation phase corresponds to one of two statuses in JIRA; Hotfix Implementation or RFC Implementation. The issue is assigned an issue key which is its unique identifier in JIRA, for example UVMS-7. By including this issue key in commit messages, branch names and pull-request summaries JIRA is able to connect an issue to a piece of code.
Branches
When the JIRA issue is in one of the implementation statuses, development is expected to occur in a feature or hotfix branch in GitHub. As a developer, create a new branch based on the development branch. By including the issue key, JIRA will be able to identify branches related to the issue and provide information on these directly from the JIRA interface. The same goes for commit messages!
$ git checkout -b UVMS-7-pdf-document-hotfix
$ # Changes made to code
$ git add file1 file2
$ git commit -m 'UVMS-7: Some message'
$ git push -u origin UVMS-7-pdf-document-hotfix
Future commits to the hotfix branch are done as follows:
$ # Changes made to code
$ git add updated-file1 updated-file2
$ git commit -m 'UVMS-7: Another message'
$ git push origin UVMS-7-pdf-document-hotfix
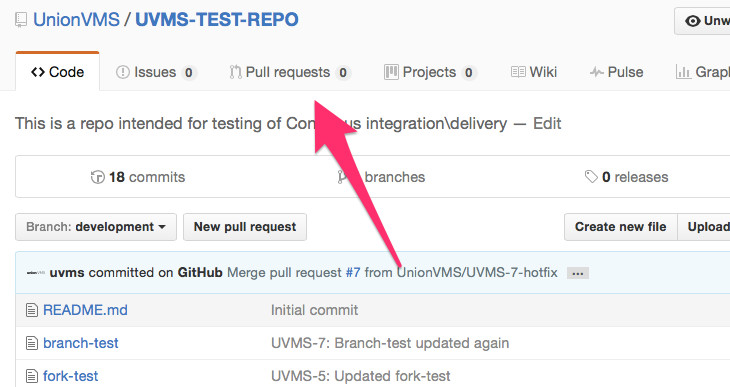
Once the hotfix is ready for review, a pull request should be opened from GitHub. To do this, go to the repository in GitHub and click Pull requests:
Then click New pull request:

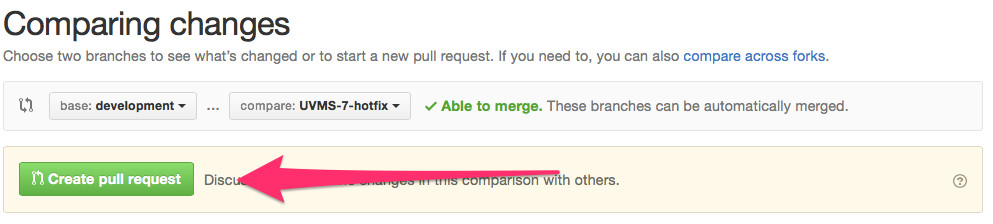
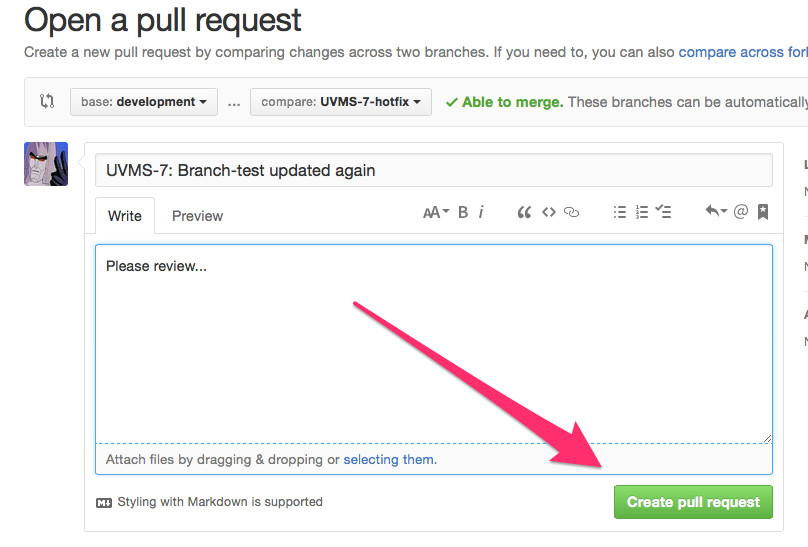
Now, the source and destination branches needs to be selected. In the left drop-down menu, select the destination branch (usually development) and in the right drop-down menu select the source branch, i.e. the hotfix or feature branch created above. Click on the button labeled Create pull request. A description may be entered and then Create pull request needs to be clicked again.
 Now the pull request is opened for review and collaborators may log in to GitHub to comment, decline or accept the pull request. When a pull request is created, the related JIRA issues are automatically transitioned into the status Waiting for Review to indicate that a review process has been started. If the pull request is accepted, then the code will be merged to the target branch and the related JIRA issues are automatically transitioned into the status Merged with Development. If the pull request is closed, i.e. declined, then the corresponding JIRA issues are transitioned back to their implementation status.
Once the pull request has been merged with development, make sure to update your local copy of the Git repository:
$ git checkout development
$ git pull origin development
Forks
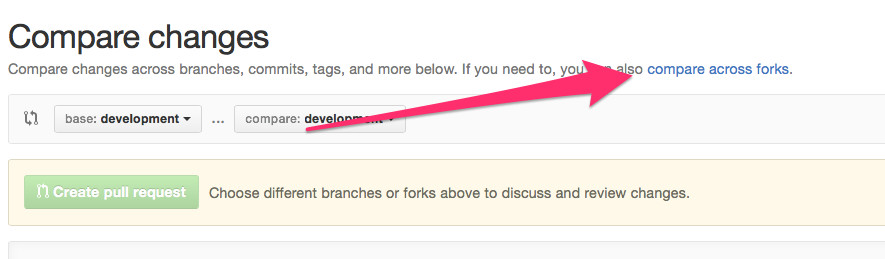
Working with forks is quite similar to the branching approach above. Basically, the entire repository is copied (forked) to another project or profile in GitHub. Developers work directly towards the fork in any way they prefer and once code needs to be merged back into the original repository a pull request is created. To create a pull request based on a fork, click on the link compare across forks when creating the pull request:
A fork workflow is suitable for people outside of the involved organisations. The fork workflow means less branches in the original repository at the cost of not being able to view all branches and their progressions directly from the repository.
Once the pull request has been merged, the fork needs to be updated. See Configuring a remote for a fork and Syncing a fork for details on how to do this.